Cluster 1: Your Daily Kubernetes Driver in One Command
By Noah Makau — DevSecOps Engineer, Entrepreneur, Nerd
Part 2 of 7 — "The Mac Kubernetes Lab: A Production-Mirror Setup from Scratch"
Previously in Part 1: We covered why OrbStack beats Multipass, the dual-cluster architecture, and M1 vs M4 CNI differences. Now we build Cluster 1 — the native K8s daily driver.
One Command to a Working Cluster
The native OrbStack cluster is where I spend most of my day. It's always on, uses around 512 MB idle, and has real LoadBalancer IPs and wildcard DNS out of the box — no MetalLB, no /etc/hosts, no configuration overhead. By the end of this article it'll have Istio, Vault, and Crossplane running too.

Starting the Cluster
# 💻 Mac
orb start k8s

kubectl get nodes
# NAME       STATUS   ROLES                  AGE   VERSION
# orbstack   Ready    control-plane,master   30s   v1.33.x

kubectl config current-context
# orbstack
That's it. You have a working Kubernetes cluster. No kubeadm, no CNI configuration, no certificate management.
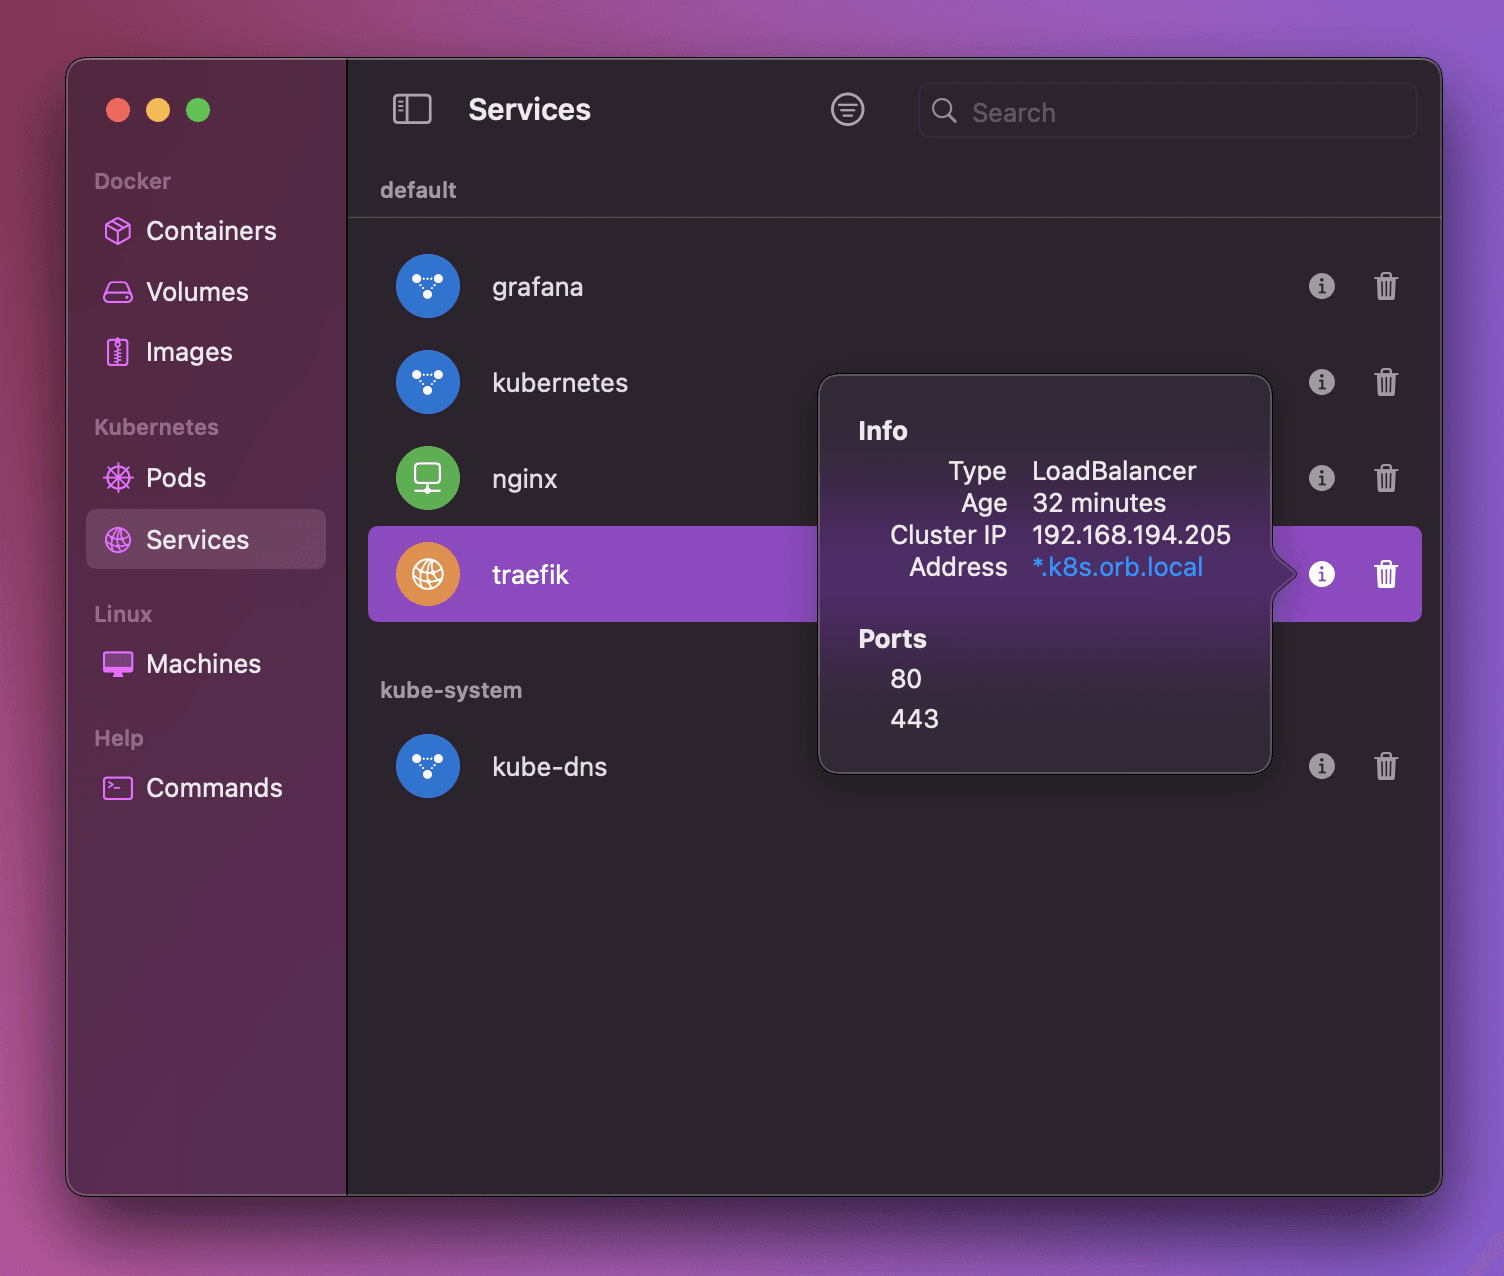
What Makes OrbStack's Networking Special
This is where OrbStack genuinely earns its keep. On a standard local cluster (kind, minikube, kubeadm), LoadBalancer services stay in <pending> state until you install MetalLB. On OrbStack native K8s:
LoadBalancer services get a real, reachable IP automatically
*.k8s.orb.localwildcard DNS resolves from your Mac browser — no/etc/hostsrequiredcluster.localDNS resolves from your MacAll service types work without
kubectl port-forward
⚠️
*.k8s.orb.localonly resolves on your Mac. Other devices on your network won't see it.
Installing Istio via Helm
We use Helm rather than istioctl for two reasons: it's consistent with how we manage Istio in production EKS, and it gives us fine-grained control over resource requests (important on a laptop).
Image: Istio components — istiod control plane, ingress gateway, and sidecar proxies
# 💻 Mac
kubectx orbstack

helm repo add istio https://istio-release.storage.googleapis.com/charts
helm repo update

# Step 1 — Base CRDs
helm install istio-base istio/base \
  --namespace istio-system --create-namespace \
  --set defaultRevision=default

# Step 2 — Control plane
# The PILOT_ENABLE_WORKLOAD_ENTRY_AUTOREGISTRATION flag is required on OrbStack
# to prevent DNS resolution conflicts with the host network
helm install istiod istio/istiod \
  --namespace istio-system \
  --set pilot.env.PILOT_ENABLE_WORKLOAD_ENTRY_AUTOREGISTRATION=true \
  --set global.proxy.resources.requests.cpu=10m \
  --set global.proxy.resources.requests.memory=64Mi \
  --wait

# Step 3 — Ingress gateway
# OrbStack assigns a real LoadBalancer IP automatically — no MetalLB needed
helm install istio-ingress istio/gateway \
  --namespace istio-ingress --create-namespace \
  --set service.type=LoadBalancer

# Verify the gateway got an EXTERNAL-IP
kubectl get svc -n istio-ingress
# NAME            TYPE           CLUSTER-IP   EXTERNAL-IP   PORT(S)
# istio-ingress   LoadBalancer   10.x.x.x     198.19.x.x    80:xxx/TCP

# Enable sidecar injection on the default namespace
kubectl label namespace default istio-injection=enabled
Gateways and VirtualServices on Native K8s
This is one of my favourite things about OrbStack native K8s. You create a Gateway pointing at *.k8s.orb.local and it just works from your Mac browser. No IP lookups, no /etc/hosts entries.
How It Works
The Gateway resource binds to the istio-ingress LoadBalancer. OrbStack intercepts traffic to the *.k8s.orb.local wildcard domain and routes it to that IP. The VirtualService then routes traffic to the correct Kubernetes service.
Image: Traffic flow from Mac browser through OrbStack wildcard DNS to a pod
Example 1 — Basic Routing with httpbin
# 💻 Mac
kubectl apply -f - <<EOF
apiVersion: apps/v1
kind: Deployment
metadata:
  name: httpbin
spec:
  replicas: 1
  selector:
    matchLabels:
      app: httpbin
  template:
    metadata:
      labels:
        app: httpbin
    spec:
      containers:
      - name: httpbin
        image: kennethreitz/httpbin:latest
        ports:
        - containerPort: 80
---
apiVersion: v1
kind: Service
metadata:
  name: httpbin
spec:
  selector:
    app: httpbin
  ports:
  - port: 80
    targetPort: 80
---
apiVersion: networking.istio.io/v1beta1
kind: Gateway
metadata:
  name: httpbin-gateway
spec:
  selector:
    istio: ingress
  servers:
  - port:
      number: 80
      name: http
      protocol: HTTP
    hosts:
    - "httpbin.k8s.orb.local"
---
apiVersion: networking.istio.io/v1beta1
kind: VirtualService
metadata:
  name: httpbin
spec:
  hosts:
  - "httpbin.k8s.orb.local"
  gateways:
  - httpbin-gateway
  http:
  - route:
    - destination:
        host: httpbin
        port:
          number: 80
EOF
Open http://httpbin.k8s.orb.local in your Mac browser. It works immediately.
Image: httpbin running at httpbin.k8s.orb.local — no port-forward, no /etc/hosts
Example 2 — Traffic Splitting (Canary)
This is the same pattern used in production canary deployments:
# 💻 Mac
kubectl apply -f - <<EOF
apiVersion: networking.istio.io/v1beta1
kind: VirtualService
metadata:
  name: myapp-split
spec:
  hosts:
  - "myapp.k8s.orb.local"
  gateways:
  - myapp-gateway
  http:
  - route:
    - destination:
        host: myapp-v1
        port:
          number: 80
      weight: 80
    - destination:
        host: myapp-v2
        port:
          number: 80
      weight: 20
EOF
Example 3 — Path-Based Routing
Route /v1 and /v2 requests to different backend services:
# 💻 Mac
kubectl apply -f - <<EOF
apiVersion: networking.istio.io/v1beta1
kind: VirtualService
metadata:
  name: path-routing
spec:
  hosts:
  - "api.k8s.orb.local"
  gateways:
  - api-gateway
  http:
  - match:
    - uri:
        prefix: /v1
    route:
    - destination:
        host: api-v1-svc
        port:
          number: 80
  - match:
    - uri:
        prefix: /v2
    route:
    - destination:
        host: api-v2-svc
        port:
          number: 80
EOF
⚠️ Known OrbStack Gotcha — httpsRedirect
Do not use httpsRedirect: true in a Gateway on the native cluster. OrbStack intercepts LoadBalancer traffic in a way that causes an infinite 301 redirect loop when TLS redirect is enabled.
# ❌ This breaks on OrbStack native K8s
servers:
- tls:
    httpsRedirect: true

# ✅ Use plain HTTP on the native cluster
servers:
- port:
    number: 80
    protocol: HTTP
For TLS testing, use Cluster 2 (the VM lab cluster) where you have full control over the network stack.
Installing the Daily Stack
With the cluster and Istio running, we install the tools we use every day.
Vault (Dev Mode)
Dev mode means no unsealing, no persistence concerns, instant startup. Perfect for daily iteration work where you're testing AppRole workflows, PKI policies, or K8s auth configurations.
# 💻 Mac
helm repo add hashicorp https://helm.releases.hashicorp.com
helm repo update

helm install vault hashicorp/vault \
  --namespace vault --create-namespace \
  --set "server.dev.enabled=true"

kubectl get pods -n vault
# vault-0   1/1   Running   0   30s
For production-grade Vault with HA Raft storage, use Cluster 2. Dev mode here is intentional — it trades durability for speed.
Crossplane
Crossplane turns your Kubernetes cluster into a universal control plane for cloud infrastructure. We use it heavily with AWS provider and our custom VMware Cloud Director provider.
# 💻 Mac
helm repo add crossplane-stable https://charts.crossplane.io/stable
helm repo update

# Note: --enable-composition-functions was removed in newer versions
# Composition Functions are enabled by default
helm install crossplane crossplane-stable/crossplane \
  --namespace crossplane-system --create-namespace

kubectl get pods -n crossplane-system
Keeping the Cluster Healthy
# 💻 Mac

# Stop — releases all CPU and RAM
orb stop k8s

# Start — full state persists (deployments, services, secrets, configmaps)
orb start k8s

# Verify after restart
kubectx orbstack
kubectl get nodes
kubectl get pods -A
The native cluster state persists across stop/start. Vault dev mode data is lost on restart (by design), but everything else — Crossplane compositions, Istio config, workload deployments — comes back exactly as you left it.
Quick Reference for This Cluster
| Task | Command |
|---|---|
| Start | orb start k8s |
| Stop | orb stop k8s |
| Switch context | kubectx orbstack |
| Access service | http://<name>.k8s.orb.local |
| Istio ingress IP | kubectl get svc -n istio-ingress |
| Enable sidecar injection | kubectl label ns <name> istio-injection=enabled |
What's Next
Cluster 1 is up and running. In Part 3, we move to Cluster 2 — creating the four OrbStack VMs, setting up networking, and bootstrapping a production-grade 3-tier Vault PKI that will serve as the Certificate Authority for our Kubernetes cluster.
← Part 1: Why I Replaced Multipass with OrbStack | Part 3: Cluster 2 — VMs, Networking, and Vault PKI →
Noah Makau is a DevSecOps Engineer, Entrepreneur, and self-described Nerd. He holds CKA, CKAD, AWS Solutions Architect Professional, AWS Solutions Architect Associate, and AWS Cloud Practitioner certifications. He is the founder of Arkila Systems, a DevOps consultancy, where he designs and operates Kubernetes, HashiCorp Vault, Crossplane, and CI/CD pipelines at scale. He is currently preparing for CKS certification.