Cluster 2: VMs, Networking, and a Production-Grade Vault PKI
By Noah Makau — DevSecOps Engineer, Entrepreneur, Nerd
Part 3 of 7 — "The Mac Kubernetes Lab: A Production-Mirror Setup from Scratch"
Previously in Part 2: We built Cluster 1 — the native K8s daily driver with Istio, Vault dev mode, and Crossplane. Now we start Cluster 2: four OrbStack VMs, proper networking, and a 3-tier Vault PKI that will sign all our Kubernetes certificates.
Why a Separate VM Cluster?
The native OrbStack cluster is excellent for daily work, but it has a hard limitation: it's single-node. You can't test multi-node behaviours — node affinity, pod disruption budgets, rolling upgrades across nodes, or the kind of disk pressure incidents that happen in production.
Cluster 2 is built for that. Four VMs, a genuine kubeadm-bootstrapped cluster, and a certificate authority managed by HashiCorp Vault — the same PKI approach used in many enterprise Kubernetes deployments.
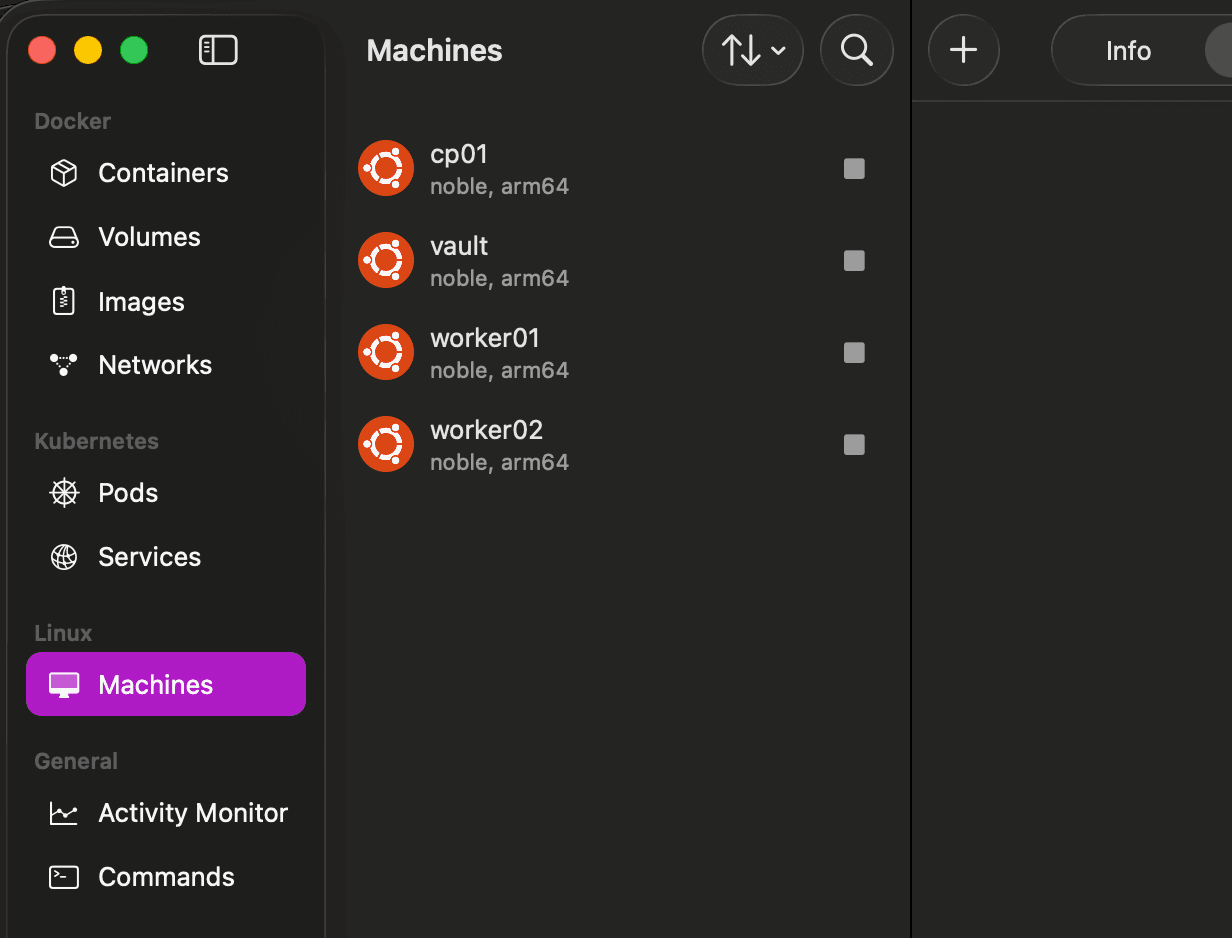
Image: VM cluster topology — vault VM acts as PKI CA, cp01 is control plane, worker01 and worker02 are worker nodes
Creating the VMs
OrbStack VMs are Ubuntu Noble (24.04) ARM64. They boot in under 3 seconds and share memory with the host — they only consume what they actually need.
# 💻 Mac
orb create ubuntu:noble vault
orb create ubuntu:noble cp01
orb create ubuntu:noble worker01
orb create ubuntu:noble worker02

orb list
Getting into any VM is as simple as:
# 💻 Mac
ssh vault@orb
ssh cp01@orb
ssh worker01@orb
No key management. No IP lookup. OrbStack handles SSH automatically.
Record the IPs
# 💻 Mac
for vm in vault cp01 worker01 worker02; do
  echo "\(vm: \)(orb run -m \(vm hostname -I | awk '{print \)1}')"
done
You'll get output like:
vault: 192.168.139.100
cp01: 192.168.139.101
worker01: 192.168.139.102
worker02: 192.168.139.103
Set these on your Mac and persist them on each VM:
# 💻 Mac
export VAULT_IP=192.168.139.100
export CP_IP=192.168.139.101
export W1_IP=192.168.139.102
export W2_IP=192.168.139.103
# 🖥️ VM: vault / cp01 / worker01 / worker02 (run on each)
cat >> ~/.bashrc <<EOF
export VAULT_IP=<vault-ip>
export CP_IP=<cp01-ip>
export W1_IP=<worker01-ip>
export W2_IP=<worker02-ip>
EOF
source ~/.bashrc
Why persist to
.bashrc? OrbStack VM shell sessions don't share environment variables. Every time you SSH into a VM, you start with a clean environment. Persisting IPs to.bashrcmeans they're always available without manual re-export.
/etc/hosts on All VMs
Each VM needs to resolve the others by hostname. Run this on every VM:
# 🖥️ VM: vault / cp01 / worker01 / worker02 (run on each)
sudo tee -a /etc/hosts <<EOF
$VAULT_IP    vault vault.lab.local
$CP_IP       cp01 cp01.lab.local kubernetes
$W1_IP       worker01 worker01.lab.local
$W2_IP       worker02 worker02.lab.local
EOF
Why Vault PKI?
Most kubeadm tutorials have you use self-signed certificates that kubeadm generates automatically. That works, but it has nothing in common with how certificates are managed in a real enterprise cluster.
In production, we use Vault PKI. It gives you:
A proper certificate hierarchy — Root CA → Intermediate CA → leaf certificates
Short-lived credentials — admin certificates with 1-hour TTLs instead of long-lived kubeconfig credentials
Auditability — every certificate issuance is logged in Vault
Role-based issuance — separate roles for kube-apiserver, kubelet, etcd, and admin
Setting this up locally means the mental model from your lab matches production.
Image: 3-tier PKI hierarchy — Root CA signs the Intermediate CA, which issues all cluster certificates
Installing Vault on the vault VM
The minimal OrbStack Ubuntu image doesn't include gpg by default. This trips people up — adding the HashiCorp repo before installing gpg leaves a broken unsigned repo entry that blocks all future apt update calls. Always install gpg first and clean up any stale entries.
# 🖥️ VM: vault

# Remove any stale repo entry from a previous attempt
sudo rm -f /etc/apt/sources.list.d/hashicorp.list

# Install prerequisites first
sudo apt update && sudo apt install -y gpg curl apt-transport-https ca-certificates jq

# Import HashiCorp GPG key
curl -fsSL https://apt.releases.hashicorp.com/gpg | \
  sudo gpg --dearmor -o /usr/share/keyrings/hashicorp-archive-keyring.gpg

# Add repo with signed-by reference
echo "deb [arch=$(dpkg --print-architecture) signed-by=/usr/share/keyrings/hashicorp-archive-keyring.gpg] \
  https://apt.releases.hashicorp.com $(lsb_release -cs) main" \
  | sudo tee /etc/apt/sources.list.d/hashicorp.list

sudo apt update && sudo apt install -y vault
Configure and start Vault:
# 🖥️ VM: vault

sudo mkdir -p /opt/vault/data
sudo chown -R vault:vault /opt/vault/data

sudo tee /etc/vault.d/vault.hcl <<EOF
storage "file" {
  path = "/opt/vault/data"
}
listener "tcp" {
  address     = "0.0.0.0:8200"
  tls_disable = true
}
ui       = true
api_addr = "http://vault.lab.local:8200"
EOF

sudo chown vault:vault /etc/vault.d/vault.hcl
sudo systemctl enable vault && sudo systemctl start vault

export VAULT_ADDR='http://127.0.0.1:8200'
vault status
Initialize and Unseal
# 🖥️ VM: vault

# Save to home dir — writing to /root gives "permission denied"
vault operator init -key-shares=1 -key-threshold=1 > ~/vault-init.txt

export VAULT_UNSEAL_KEY=\((grep 'Unseal Key 1' ~/vault-init.txt | awk '{print \)NF}')
export VAULT_ROOT_TOKEN=\((grep 'Initial Root Token' ~/vault-init.txt | awk '{print \)NF}')

vault operator unseal $VAULT_UNSEAL_KEY
vault login $VAULT_ROOT_TOKEN

# Persist so these survive session restarts
echo "export VAULT_ADDR='http://127.0.0.1:8200'" >> ~/.bashrc
echo "export VAULT_TOKEN=\((grep 'Initial Root Token' ~/vault-init.txt | awk '{print \)NF}')" >> ~/.bashrc
source ~/.bashrc
Save
~/vault-init.txtcarefully. With a single key share, this file contains everything needed to unseal and access Vault. In production you'd use multiple key shares and distribute them. For a lab, one share is fine.
Building the 3-Tier PKI
Root CA
The Root CA signs nothing directly except the Intermediate CA. In a production setup, the root key would be kept offline. Here we keep it in Vault but never use it for anything except signing the intermediate.
# 🖥️ VM: vault

vault secrets enable -path=pki pki
vault secrets tune -max-lease-ttl=87600h pki   # 10 years

vault write -field=certificate pki/root/generate/internal \
  common_name="Lab Root CA" ttl=87600h > /tmp/root-ca.crt

vault write pki/config/urls \
  issuing_certificates="http://vault.lab.local:8200/v1/pki/ca" \
  crl_distribution_points="http://vault.lab.local:8200/v1/pki/crl"
K8s Intermediate CA — The Critical Part
Here is where most guides go wrong. The default intermediate CA type in Vault is internal — the private key is generated inside Vault and never leaves. That's great for security, but kubeadm needs the CA private key on disk at /etc/kubernetes/pki/ca.key to sign all the cluster certificates.
You must use exported type. The private key is returned only once — at generation time — so we save the full JSON response before extracting anything from it.
# 🖥️ VM: vault

vault secrets enable -path=pki_k8s pki
vault secrets tune -max-lease-ttl=43800h pki_k8s   # 5 years

# CRITICAL: use 'exported' not 'internal'
# Save the FULL JSON — private key is only returned at generation time
vault write -format=json pki_k8s/intermediate/generate/exported \
  common_name="Lab K8s Intermediate CA" \
  | tee /tmp/intermediate-full.json \
  | jq -r '.data.csr' > /tmp/k8s-intermediate.csr

# Extract and save the private key immediately
jq -r '.data.private_key' /tmp/intermediate-full.json > /tmp/ca.key

# Verify — must show -----BEGIN RSA PRIVATE KEY-----
cat /tmp/ca.key
Sign the intermediate with the Root CA and import it back:
# 🖥️ VM: vault

vault write -format=json pki/root/sign-intermediate \
  csr=@/tmp/k8s-intermediate.csr format=pem_bundle ttl=43800h \
  | jq -r '.data.certificate' > /tmp/k8s-intermediate-signed.pem

vault write pki_k8s/intermediate/set-signed \
  certificate=@/tmp/k8s-intermediate-signed.pem

# Configure AIA URLs — resolves the "authority information access" warning
vault write pki_k8s/config/urls \
  issuing_certificates="http://vault.lab.local:8200/v1/pki_k8s/ca" \
  crl_distribution_points="http://vault.lab.local:8200/v1/pki_k8s/crl"
Roles
Roles define what certificates each component of the cluster can request:
# 🖥️ VM: vault

# API server — can use SANs for all DNS names and IPs the apiserver answers on
vault write pki_k8s/roles/kube-apiserver \
  allowed_domains="kubernetes,kubernetes.default,kubernetes.default.svc,kubernetes.default.svc.cluster.local,cp01,cp01.lab.local" \
  allow_bare_domains=true allow_subdomains=true allow_ip_sans=true max_ttl=8760h

# Kubelet — nodes in the system:nodes group
vault write pki_k8s/roles/kubelet \
  allowed_domains="system:node" allow_bare_domains=true \
  organization="system:nodes" max_ttl=8760h

# Admin — short-lived, 2 hour maximum (CKS best practice)
# This forces regular credential rotation and prevents long-lived kubeconfig files
vault write pki_k8s/roles/admin \
  allowed_domains="kubernetes-admin" allow_bare_domains=true \
  organization="system:masters" server_flag=false client_flag=true max_ttl=2h

# etcd
vault write pki_k8s/roles/etcd \
  allow_any_name=true max_ttl=8760h

# Policy for cluster bootstrap
vault policy write k8s-pki - <<EOF
path "pki_k8s/issue/*" { capabilities = ["create","update"] }
path "pki_k8s/sign/*"  { capabilities = ["create","update"] }
path "pki_k8s/ca"      { capabilities = ["read"] }
path "pki_k8s/ca/pem"  { capabilities = ["read"] }
path "pki_k8s/crl"     { capabilities = ["read"] }
EOF
Distributing CA Certs to cp01
kubeadm looks for /etc/kubernetes/pki/ca.crt and /etc/kubernetes/pki/ca.key before init. If both files are present, it uses them as the cluster CA instead of generating new self-signed certificates.
# 🖥️ VM: vault — issue apiserver cert to extract the CA cert
export CP_IP=<cp01-ip>   # always set explicitly — doesn't persist across sessions
echo "CP_IP=$CP_IP"

vault write -format=json pki_k8s/issue/kube-apiserver \
  common_name="kubernetes" \
  alt_names="kubernetes,kubernetes.default,kubernetes.default.svc,kubernetes.default.svc.cluster.local,cp01" \
  ip_sans="$CP_IP,127.0.0.1,10.96.0.1" ttl=8760h > /tmp/apiserver-cert.json

jq -r '.data.issuing_ca' /tmp/apiserver-cert.json > /tmp/ca.crt
# 💻 Mac — pull both files and push to cp01
orb run -m vault cat /tmp/ca.crt > /tmp/lab-ca.crt
orb run -m vault cat /tmp/ca.key > /tmp/lab-ca.key

orb run -m cp01 sudo mkdir -p /etc/kubernetes/pki
cat /tmp/lab-ca.crt | orb run -m cp01 sudo tee /etc/kubernetes/pki/ca.crt
cat /tmp/lab-ca.key | orb run -m cp01 sudo tee /etc/kubernetes/pki/ca.key

# kubeadm requires strict permissions on ca.key
orb run -m cp01 sudo chmod 600 /etc/kubernetes/pki/ca.key

# Verify
orb run -m cp01 sudo ls -la /etc/kubernetes/pki/
# -rw-r--r-- ca.crt
# -rw------- ca.key
Why use
orb run -m vault catinstead ofscpororb shell? When we need file content on the Mac,orb runpipes stdout directly.orb shellopens an interactive session andscprequires setting up keys. For simple file reads,orb run -m <vm> cat <file> > local-fileis the cleanest approach.
A Note on /tmp
/tmp on OrbStack VMs does not persist across reboots. The CA cert and key we extracted will be gone the next time you restart the vault VM. That's fine — you can always regenerate them from Vault:
# 🖥️ VM: vault — regenerate CA cert after reboot
vault read -field=certificate pki_k8s/issuer/default > /tmp/lab-ca.crt
The private key (/tmp/ca.key) was saved from the exported generation step. If you need it again, you'll need to re-export from ~/intermediate-full.json (which does persist):
# 🖥️ VM: vault
jq -r '.data.private_key' ~/intermediate-full.json > /tmp/ca.key
Where We Are
At this point we have:
✅ Four OrbStack VMs created and networked
✅
/etc/hostsconfigured on all VMs for hostname resolution✅ Vault installed, initialised, and unsealed on the vault VM
✅ 3-tier PKI: Root CA → K8s Intermediate CA (exported)
✅ Roles for kube-apiserver, kubelet, etcd, and short-lived admin
✅
ca.crtandca.keyplaced on cp01 ready for kubeadm
In Part 4, we run kubeadm init and tackle the most interesting part of this setup — why Calico works on M4 but not M1, and how Cilium's eBPF dataplane solves it.
← Part 2: Cluster 1 — Your Daily K8s Driver in One Command | Part 4: kubeadm 1.34 — M1 vs M4 CNI Deep Dive →
Noah Makau is a DevSecOps Engineer, Entrepreneur, and self-described Nerd. He holds CKA, CKAD, AWS Solutions Architect Professional, AWS Solutions Architect Associate, and AWS Cloud Practitioner certifications. He is the founder of Arkila Systems, a DevOps consultancy — where he designs and operates Kubernetes, HashiCorp Vault, Crossplane, and CI/CD pipelines at scale. He is currently preparing for CKS certification.